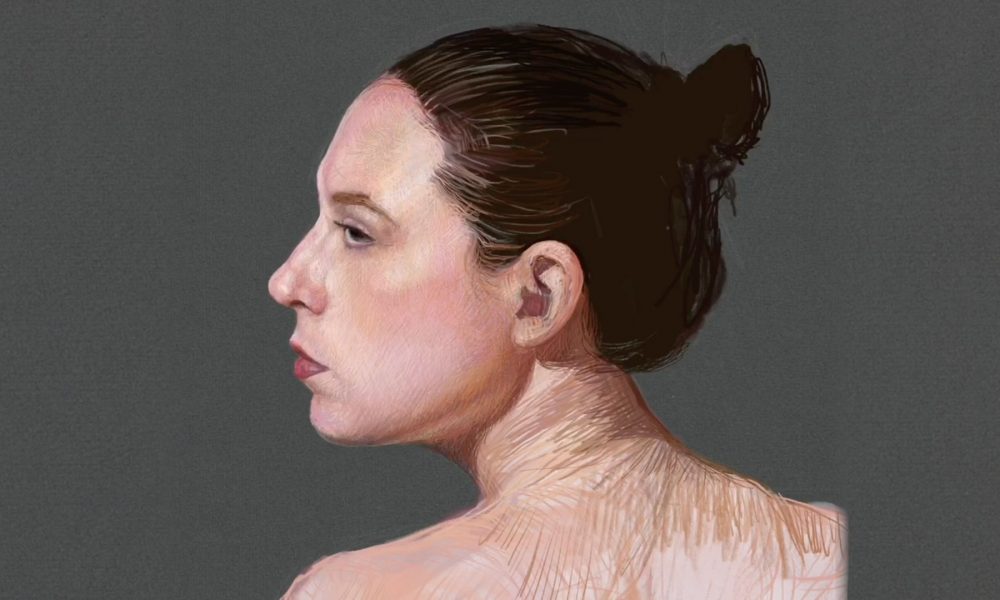
Good day, Beartarians! Today I’ll lead you through a step by step guide of portraiture. In this example, I am using a hybrid of painting and drawing. I found the model on the vast ether but I encourage you to seek out your own model reference and follow along with me. I suggest referencing from an image, in profile position at first.
I’ve uploaded the full process video to youtube for your reference. Note that I am using an iPad and the app Procreate as my tools, but this guide can apply to traditional mediums as well.
If you would like to contribute any how-tos, guides, or simple overviews of your artistic process, please send your content directly to Arts@beartariatimes.com.
Step One: Roughing out the Shapes
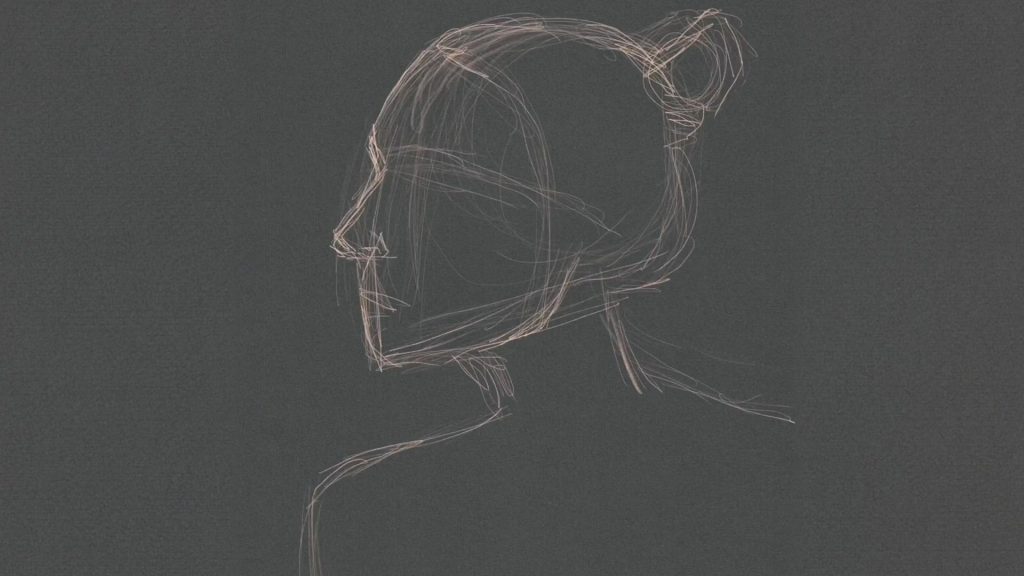
Using a light pencil, I outlined the rough profile in the middle of my canvas. I constructed the basic proportions of the head using very simple shapes. This allowed me to get a feel for the general composition as well as the proportions of the head. Keep it loose and allow your pencil to flow as you rough out your composition.
Step Two: Defining the Features
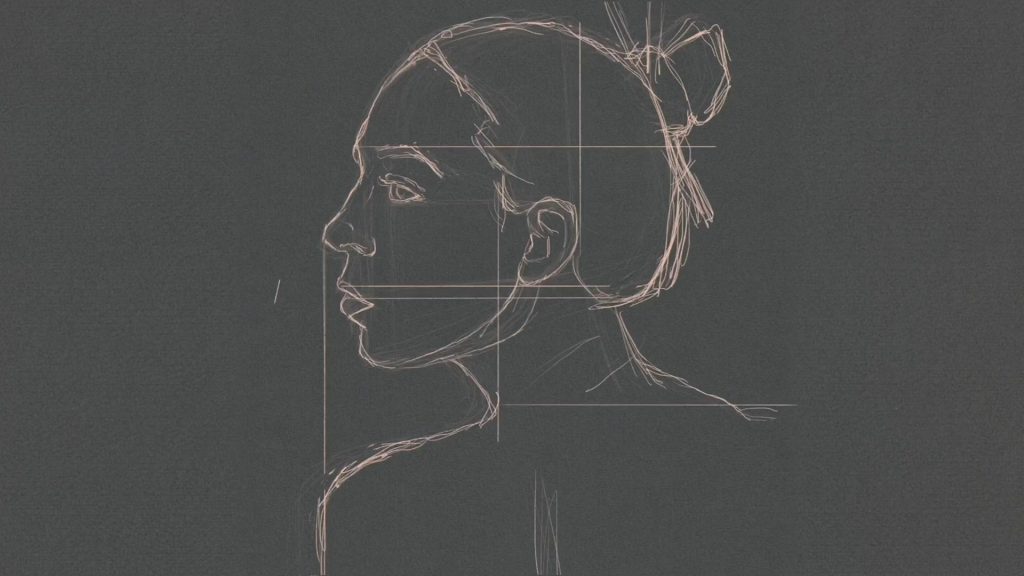
Once the general proportions were set, I started defining the facial features. Pay attention to the eyes, nose, lips, and ears. How do they exist in proximity to one another? Don’t add unnecessary details or value at this point. Strictly use this stage to improve upon your shapes and align the facial features. I suggest drawing guidelines to help with placement and proportion.
Step Three: Improving Shapes
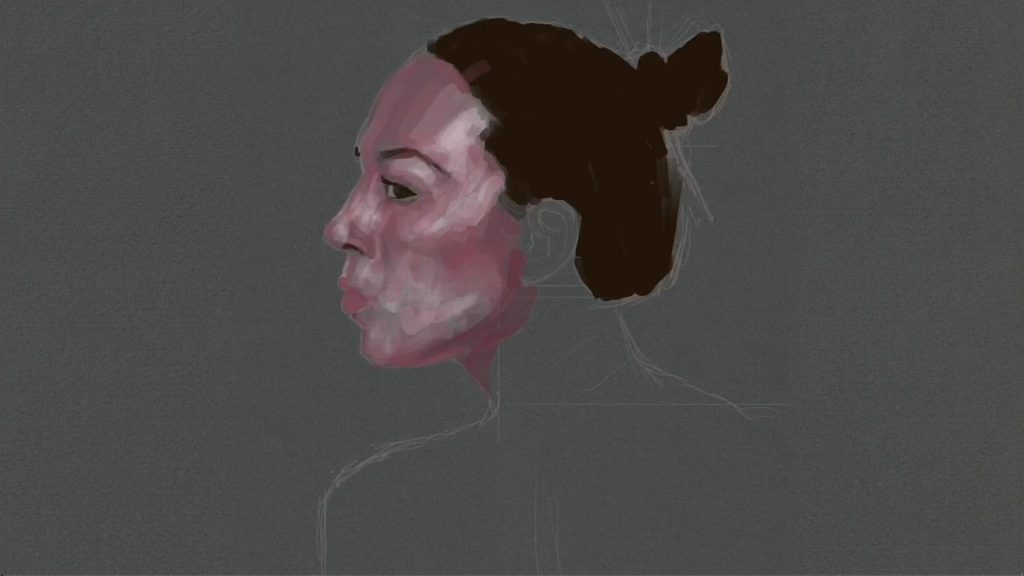
After the features were well defined, I started adding value and color to help improve the facial features. You will want to use this stage to double-check the accuracy of your proportions as well as make any large corrections to your composition. As you mass in the darks and mid-tones, you will start to recognize the individual you are referencing. Continually take a step back and make sure you are capturing the mood the individual is expressing.
Step Four: Massing in Color
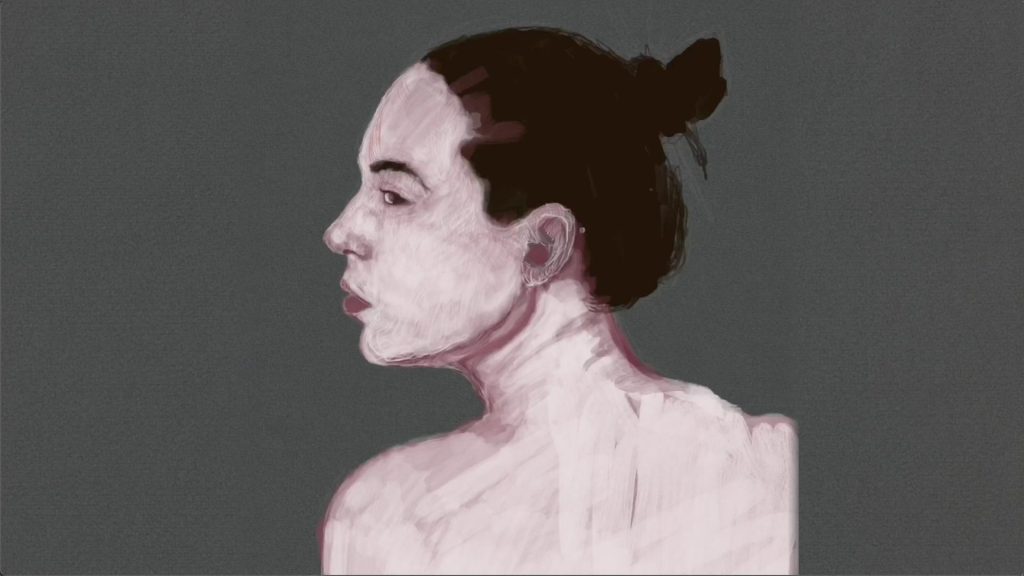
Since my canvas was dark, I massed in the lighter skin tones. This helped me to further define the facial features and provide an under base. You can use this stage to start layering in all the light to mid-tones and further contrast the darker shapes. I can’t stress enough how important an under base is when it comes to painting. As you start adding flesh tones, the under base serves as a primer and adds to the vibrancy and contrast of colors on top.
Step Five: Adding Flesh Colors
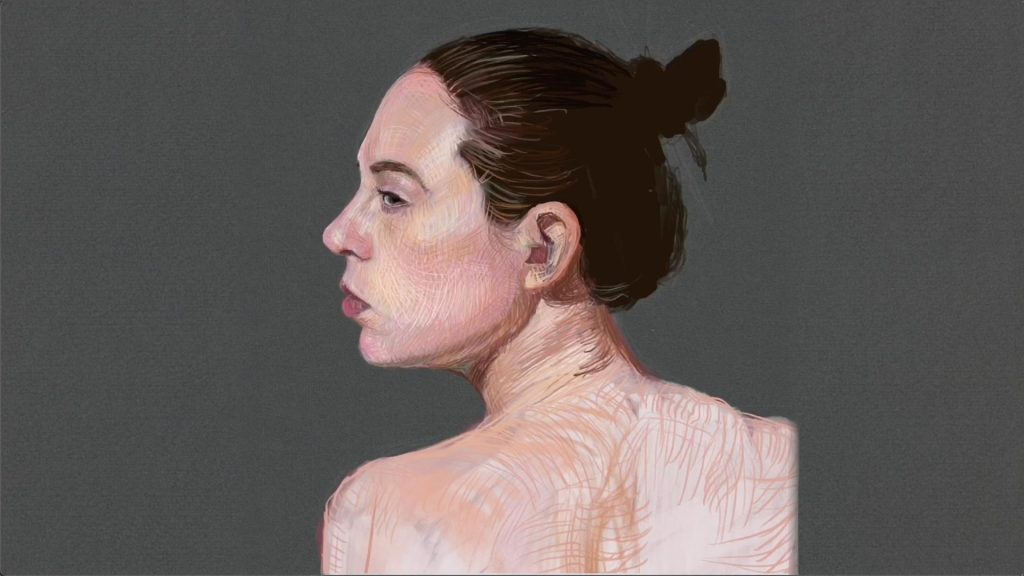
Adding flesh colors is my favorite part of the process. I added in light reds and yellows as well as a darker brown umber. As you are adding in color, continue to modify and iterate the proportions of the figure. Your own personal style can be used here so don’t be afraid to experiment. I used a thinner pencil and a technique known as contour hatching.
Step Five: Developing Richer Colors
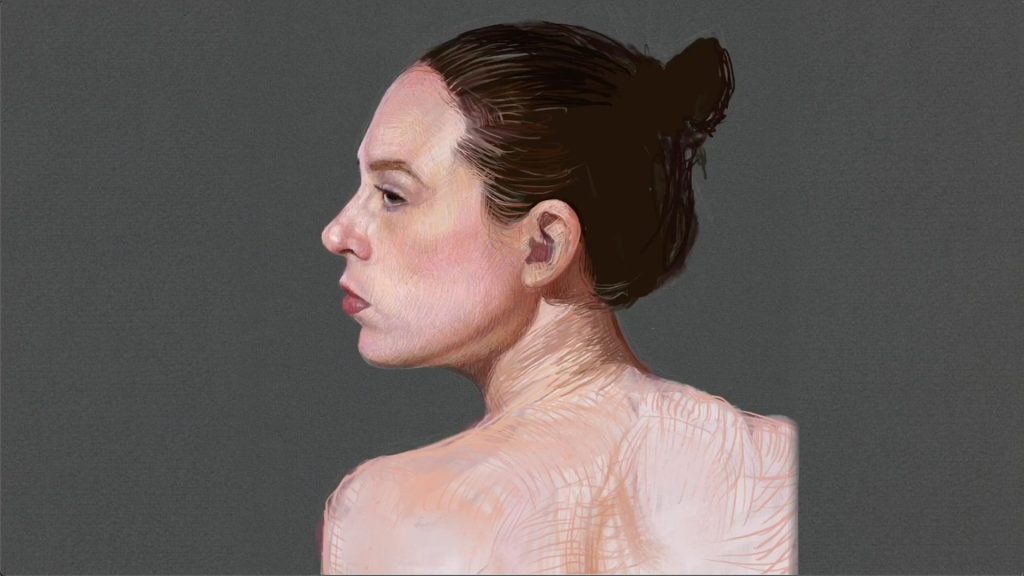
After setting up the proportions, values, and general style, I focused on developing richer colors. I was constantly improving upon the drawing by checking the proportion and alignment but it was now time to start adding in colors to elevate the final piece. Colors that you would not normally think existed in skin tones such as purples, greens, and oranges, are necessary to help bring your portrait to life. Take some time to focus on your reference, and see how these secondary colors can be applied.
Step Seven: Details
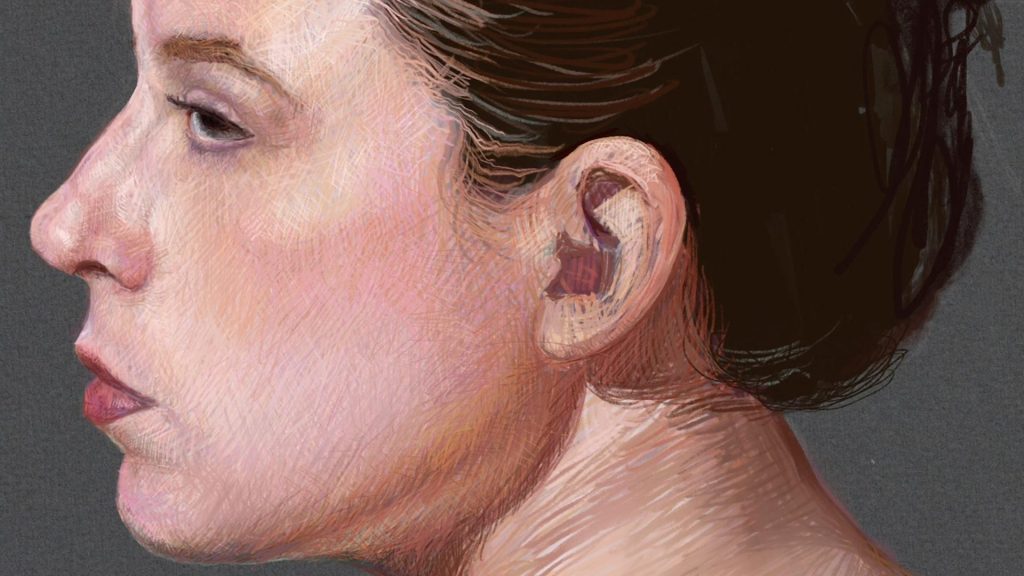
The final step in the process is deciding how much detail you would like to add for your final piece. As you move further towards the final piece, use smaller tool strokes for emphasis. In this example I chose to keep some of the areas undeveloped. This is a technique to add a focal point to your composition. I wanted the viewer to focus in on the Nose, lips, eyes, and jaw so I left the rest of the portrait less detailed.
Don’t get too hung up on mistakes at this point. Practice makes perfect and no piece of art is truly finished. You have to learn when to move on to your next piece.
If you have any questions or would like to share some art with us, please reach out to us at Arts@beartariatimes.com.
Thank you,
MC-Bear (Nero)
