Farming
Getting Started with Permaculture By Mr. Permie Bear

Sometimes getting started on something is the hardest part, it certainly was for me getting around to finally writing something. Now that the so-called pen is on the paper, what comes next is likely to feel somewhat like a whirlwind on my end, but hopefully not on yours. I hope that what follows will help you get started and help you crush on a whole new level.
Before we can really get into some of the details, we ought to start out with a simple definition of permaculture. It’s a wonderful combination of amusing and inspiring when someone finds out that I am a Certified Permaculture Designer and comes up to me to say, “I just planted my first permaculture!”. Sometimes their excitement just can’t be contained (and for good reason) and I just can’t bring myself to tell them that what they told me makes no sense, so I usually just share in their excitement. Let’s not let that happen to you. By all means get excited, but do it with correct definitions. The word “Permaculture” is often defined as a combination of “permanent” and “agriculture” and while that’s close, it’s actually not quite the whole story. It’s really more like a combination of “permanent” and “culture”. It just so happens that often the easiest and most visible application is as it relates to agriculture. At its core, permaculture is a design language. It is a lens that we view and solve problems through. Ethics are at the core of permaculture and the tools we use to solve these problems are based upon patterns observed in nature. In essence, it is a way of thinking and designing systems to meet all of our needs as people living in this realm in perpetuity using ways that are not extraction based, but regenerative and therefore highly resilient and hopefully as permanent as anything can be. Systems and solutions that are Integrated and often times multidisciplinary, not singular and stand-alone. The three core ethics of Permaculture are:
1) Earth Care
2) People Care
3) Return of Surplus
These three ethics stem from the prime directive of Permaculture, which is the thought that in this life, we cannot rely on extraction based systems that value neither people nor the creation as a whole and that the only ethical thing to do is to provide for our own needs and the needs of our families. Something that many people in this and other communities really understand. Everything we do within the framework of Permaculture must look to those three ethics and if it does not uphold those, then our design needs work. So, for example, let’s say you decide to plant a garden. Does the way in which you plant and manage your garden meet these ethics? If you prepare your garden by spraying roundup to kill the grass, fertilize with miracle-gro, spray chemical pesticides, and burn all the garden residues – I’d say that’s a miss on 3 of 3. Let’s instead say that you use light blocking tarps or heavy mulch to kill the grass, manage the garden organically, and compost all your garden residues-Now we just hit 3 of 3. We can of course do better, but all of the things done in the second example are life affirming, not life destroying. That’s the kind of thinking we need.
I guess there’s one other critical part of permaculture that is really present in everything and that is the connections between systems. That’s really what we are identifying and implementing when we look for patterns in nature. It is my belief that those patterns were made by God and there can be no better guide than what the Creator has set before us.

Chickens and sheep working together to build soil. The sheep manure mixed with spent hay is piled up with whole grains mixed in the layers to give the chickens incentive to scratch and turn the piles, thus quickening the compost process. This compost will layer fertilize vegetables grown in the greenhouse.
The systems and patterns can be very simple, or very complex. Often times the more complex the system, the more stable it is because we have a plethora of redundancies. We already gave one example of a simple system, Plant a garden organically, compost everything you don’t eat. But that’s not many connections, and remember, as practitioners of permaculture, we are in the connection business. So, what if we add chickens? Chickens can turn the compost for us, get part of their feed from finding bugs in the compost, and add their manure so the compost is more fertile. If we got really crazy, chickens could also prepare our garden beds for planting. If we were to go absolutely bonkers we could add pigs to till the garden, chickens to level it back out and clean up after the pigs (who both eat the garden surplus, thus decreasing our need to buy food), the chicken and pig manure enriches the soil, we add guineas walking in and around the garden for bug control, have ducks around the perimeter eating bugs that would find their way to the garden, set up duck bathing pools around the garden perimeter so we can use the water from their bathing pools to water and fertilize the gardens (all in one shot), add certain plants to be used specifically for mulch and rabbit food (who have an area where their manure is collected for fertilizer), meat from these rabbits is used for people food and to feed the dogs that guard the sheep, which graze the grass in the orchard and fertilize it, which surrounds the garden providing a wind break and extra compost materials, more chicken food, and more pig food. See all the connections? Do you see how the needs of the system are being provided by the system? The nature mimicry? Rabbits garden, sheep fertilize, pigs dig, chickens scratch. They all eat. They have the chance to all exhibit these innate behaviors, each with inputs and outputs. We simply observed and designed. Returning to the 3 ethics:
- Earth care – Are the plants, animals, and soil taken care of? Yes, Animals are able to express their innate and unique behaviors. They are fed varied diets. Soil is protected with mulch and enriched with manure and compost. Pests are kept in check by animal and insect predators, therefore pesticides aren’t needed or used. (Note that I said, “Kept in check”. There will be some pests in the garden, that’s why they can be used as guinea food for example.)
- People care – The people work less because the animals are doing a lot of the work. Sure, you have to move them around, but compare that to all the individual tasks you now have to do less of like mowing, weeding, turning the compost, tilling, picking bugs, spraying plants, etc. Not to mention the enjoyment of working with each part of the system and the extreme health that will likely result from eating such high-quality food. (You will still have to weed, especially as you just get started. Sorry, But if managed well, weeding should be less and less each year.)
- Return of surplus – Compost is created and used. Manure is incorporated into the system whether as a compost addition, directly applying to the ground (as in the case of the sheep), or used to make liquid fertilizer (as in the case of the ducks). Nothing goes to waste. This system will yield more than we humans can possibly consume and so the excess goes back into the system and is used to further sustain it.
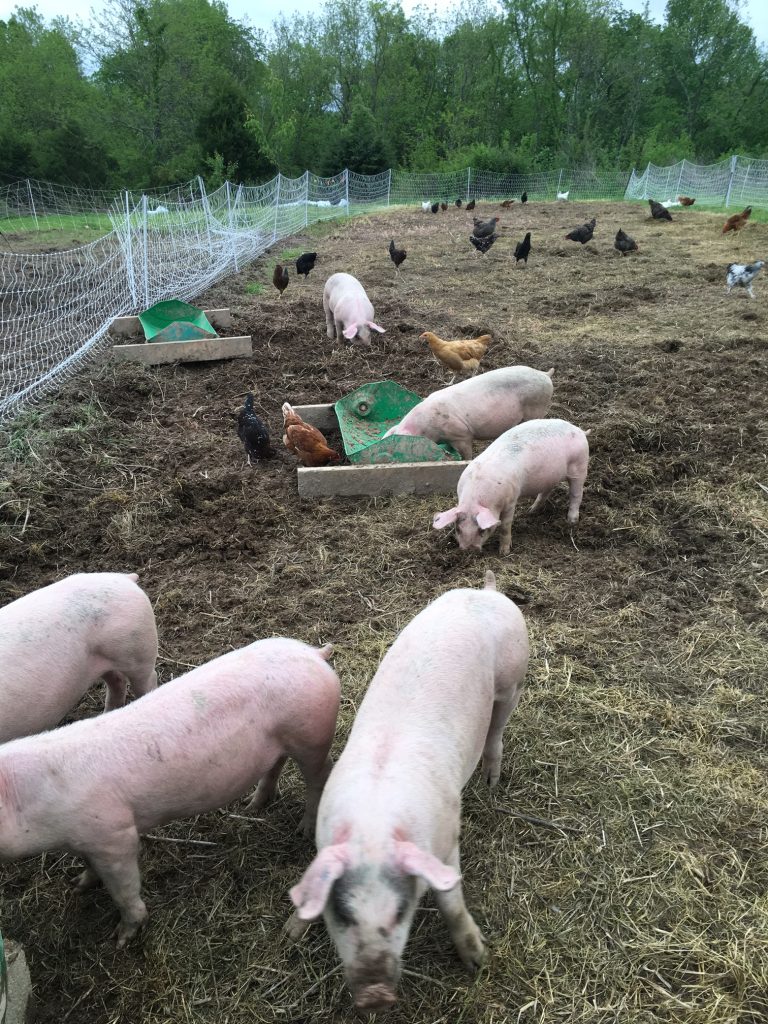
Pigs and chickens working together to turn pasture into garden. The pigs till and break up soil, the chickens help with sanitation and tilling while eating weed seeds and bugs.
Another example of a permaculture practice that might be easier for many people to implement is the creation of plant guilds. I realize many people don’t have room for pigs, sheep, large orchards, and the like, but we all have room for plant guilds. This can be as simple as companion planting in the garden. Perhaps this is planting a nitrogen fixing plant like a green bean next to or before a nitrogen using plant like corn. Perhaps this is using the famous “three sisters” guild which is pole beans, corn, and squash. The beans provide nitrogen, the corn gives the beans a place to grow, and the squash shades out weeds that would compete with the corn. This could also be as complex as a perennial polyculture under our fruit trees. “Say what Mr. Permie Bear? What is a perennial polyculture? I thought we were done with terms and definitions, then you throw this at me? How dare you?”. A perennial polyculture is just a collection of plants that come back year after year that provide things like nutrients and mulch for our fruit trees, provide habitat and food for beneficial insects, and food/medicine for us. For example, we could plant an apple tree. Say 6 feet off the tree trunk (not a firm number), in the drip line of the tree, we could plant a ring of comfrey and daffodils. This will provide mulch and block grass roots from coming in. Under the tree we can plant lemon balm, yarrow, and mint for teas, medicine, and flowers for pollinators. We can then plant garlic and thyme for cooking and keeping away certain insects. Maybe we’ll even throw in a currant bush for some more fruit and some Dutch white clover to keep out other weeds and provide nitrogen. The amount of plants you can cram in under a fruit tree is amazing! When we create plant guilds, what we are doing is stacking functions and also more fully utilizing our growing space by taking advantage of different layers (stacking layers). The stacking of functions is using that same space or system to achieve several different results such as food, medicine, pollinator support, and even beauty. Here’s what stacking layers looks like in this simplified example: in the same space required for just a tree, by stacking layers we are using the tree layer (apple), shrub layer (currant), herbaceous layer (comfrey), ground-cover layer (clover), and even the root/bulb layer (garlic).
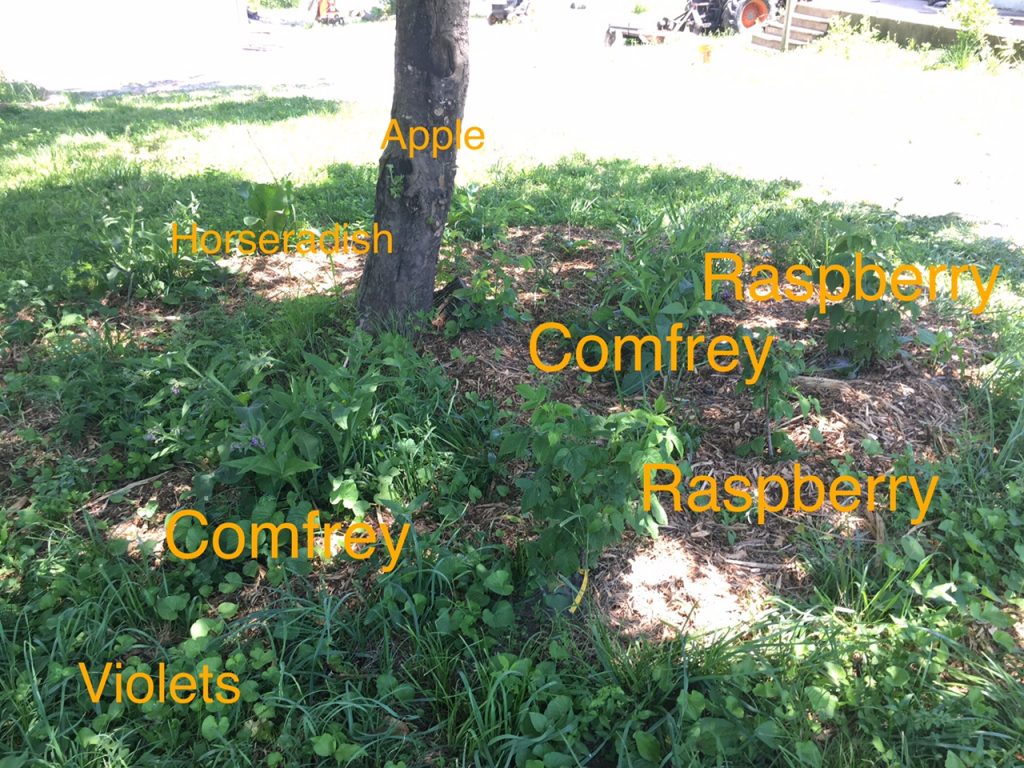
A simple polyculture. Comfrey, horseradish, violets, and comfrey grow under the canopy of an apple tree. There are also daffodils planted in a ring around the tree, but they are dormant in this photo.
When establishing plant guilds, it’s important to know that some plants are neutral towards each other, some help each other, and some are antagonistic. Each of these behaviors can have its place in our designs so it’s important to research relationships between plants based on what you are trying to accomplish, whether that’s to help something grow or even to try and stop something from growing.
Now that we have covered some of the specific aspects of plant guilds, we’ll take a step back and look at the system as a whole and once again, we can compare this to the three core ethics and see we are on solid ground.
It is truly remarkable that with proper design, we can solve or avoid many problems and create systems and gardens that are much more productive than they would be if left to their own devices. We can truly be stewards. There is a saying in the permaculture circles which is “the problem is the solution”. One of my favorite examples of this kind of thinking is attributed to Bill Mollison, the co-founder of Permaculture. When someone was complaining about all the slugs eating their crops, he replied “You don’t have a slug problem, you have a duck deficit.” In this case, the excess slugs were the solution to growing ducks for meat and eggs without having to buy feed.
So, get started by looking around you. What do you see in God’s design that is working well? What connections do you see? What connections can you make in your Beartaria? Find outputs that can be used as inputs. Are you hitting the mark on the core ethics or do you need to redesign some things? The absolute, most important thing is to try. There is no “one right way” so don’t let the fear of not knowing get in your way. With ethics at our core, it’s hard to go wrong. Get out there and discover what works for you. In a word, Crush.
Bio-
Mr. Permie Bear is a former commercial banker turned Missouri farmer. He, his wife, and their 4 children operate Piney Creek Farm in the Missouri Ozark’s and specialize in pasture raised meats and raw milk. He is also co-founder of Grateful Harvest Seed Company. His goal is to create a fully integrated permaculture farm which teaches and shows people what can be accomplished with permaculture on whatever scale they choose to engage, backyard to large farm. In his down time…. Oh wait, there is no down time.


Farming
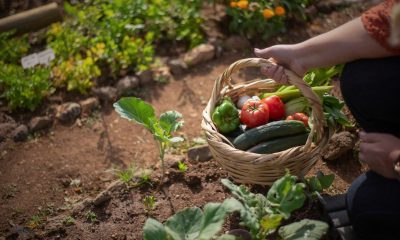
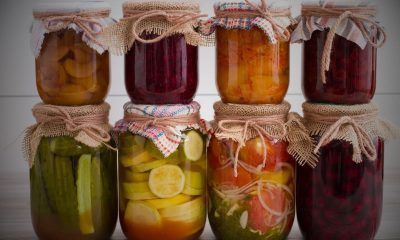
Preserving the Harvest: Techniques for Long-Term Storage
Preserving your harvest is essential for enjoying homegrown produce year-round and reducing food waste.
Preserving your harvest is essential for enjoying homegrown produce year-round and reducing food waste. There are several methods to store fruits, vegetables, and herbs for the long term, each with its unique benefits. While you dream and plan for the bounty of your harvest, enjoy these highlights of various preservation techniques and tips for getting the best results.
Canning
Benefits: Canning allows you to store fruits, vegetables, and even meats for years. It’s a great way to preserve large quantities of produce at once.
Types:
– Water Bath Canning: Ideal for high-acid foods like tomatoes, pickles, and some fruits.
– Pressure Canning: Necessary for low-acid foods like vegetables, meats, and beans to ensure safety from botulism.
Steps:
1. Wash and sterilize canning jars and lids.
2. Wash, peel, and cut produce as needed.
3. Pack the produce into jars, leaving appropriate headspace.
4. Use a water bath or pressure canner according to the recipe’s instructions.
5. Let jars cool undisturbed. Check seals before storing them in a cool, dark place.
Freezing
Benefits: Freezing retains the nutritional value and flavor of fresh produce. It’s quick, easy, and suitable for a variety of foods.
Tips:
– Blanch Vegetables: Briefly boil vegetables and then plunge them into ice water to preserve color, texture, and nutrients.
– Proper Packaging: To prevent freezer burn use airtight containers or freezer bags.
– Labeling: Always label and date your packages for easy identification and rotation.
Steps:
1. Wash, peel, and chop produce as needed.
2. Blanch vegetables in boiling water, then cool in ice water.
3. Pat produces dry to avoid ice crystals.
4. Place produce in freezer-safe bags or containers, removing as much air as possible.
5. Store in the freezer at 0°F (-18°C) or lower.
Drying and Dehydrating
Benefits: Drying removes moisture from foods, preventing the growth of bacteria and mold. It’s energy-efficient and creates lightweight, shelf-stable foods.
Methods:
– Air Drying: Suitable for herbs, hot peppers, and certain fruits. Hang produce in a dry, well-ventilated area.
– Oven Drying: Use a low oven temperature (140°F/60°C) to dry fruits, vegetables, and herbs.
– Dehydrators: Specialized appliances that provide consistently low heat and air circulation for efficient drying.
Steps:
1. Wash, peel, and slice produce uniformly.
2. Use your chosen method, ensuring the produce is completely dry.
3. Store dried foods in loosely packed containers for a week, shaking daily to evenly distribute any remaining moisture.
4. Transfer to airtight containers and store in a cool, dark place.
Fermenting
Benefits: Fermentation enhances the nutritional value of foods, adds probiotics, and provides unique flavors. It’s a natural preservation method that requires minimal equipment.
Common Fermented Foods:
– Sauerkraut: Fermented cabbage, rich in probiotics.
– Kimchi: Spicy fermented vegetables, often including cabbage and radishes.
– Pickles: Cucumbers or other vegetables fermented in a brine solution.
Steps:
1. Clean and cut vegetables as needed.
2. Mix water and salt to create a brine solution. (Brine is only needed when pickling, fermented vegetables break down when salted and their water content becomes the “brine”)
3. Place vegetables in jars, pour brine over them, and ensure they are submerged.
4. Cover jars and let sit at room temperature for several days to weeks, depending on the recipe.
5. Once fermented to taste, transfer jars to the refrigerator.
Root Cellaring
Benefits: Root cellaring is an age-old method that allows for the long-term storage of root vegetables, apples, and other hardy produce without the need for canning or freezing.
Ideal Conditions:
– Cool Temperatures: Typically 32-40°F (0-4°C).
– High Humidity: 85-95% to prevent produce from drying out.
– Ventilation: Adequate air circulation to prevent mold and rot.
Steps:
1. Select vegetables and fruits that store well, such as carrots, potatoes, beets, and apples. (Apples release ethylene gas that can cause other produce to age or rot, be mindful when storing)
2. Avoid bruising produce during harvest.
3. Use bins, shelves, or sandboxes to store produce.
4. Regularly check temperature, humidity, and the condition of stored produce.
Using preservation techniques on your harvest allows you to enjoy the flavors and nutrients of homegrown produce throughout the year. However, you do not need a harvest to start on your preservation journey, these methods will allow you to bulk buy food that might usually go to waste. Learning these methods even before you begin to farm can give you a great start before you are swamped in a harvest.
Each preservation method has its unique advantages and is suitable for different types of produce. By mastering a variety of techniques—canning, freezing, drying, fermenting, and root cellaring—you can maximize your harvest’s shelf life and reduce food waste. Happy preserving!
Did you know we have an entire category group in our app just about Preserving that currently has more than 1,800 members following it due to shared interest in the topic?
If you are interested in submitting an article for BeartariaTimes.com as a guest writer please email Editor@BeartariaTimes.com.
Farming
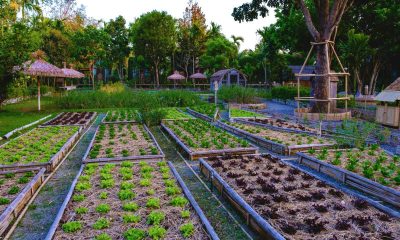
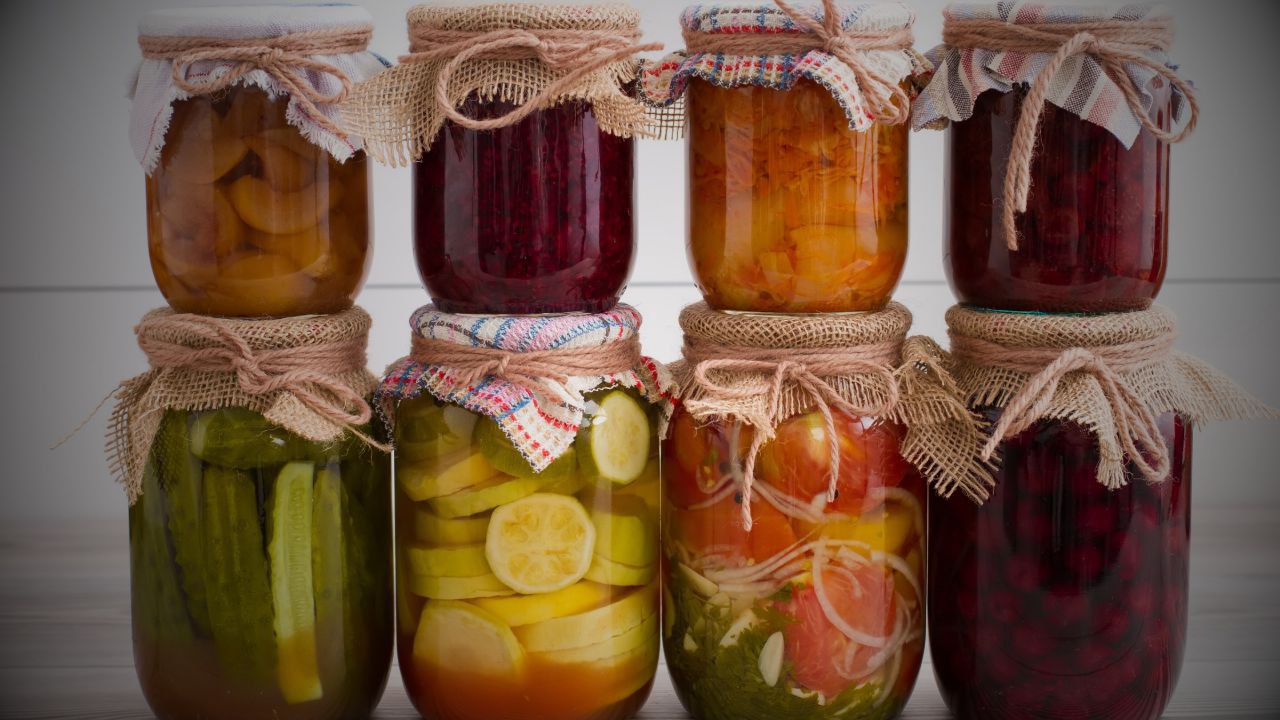
The Rise of Small-Scale Farming: Benefits, Challenges, and Tips for Success
Looking beyond the pretty Instagram pictures.
Small-scale farming has seen a significant resurgence in recent years. As more people seek sustainable and self-sufficient lifestyles, understanding the benefits and challenges of small-scale farming becomes increasingly important. This article highlights this trend and provides insights into what it takes to succeed as a small-scale farmer.
Benefits of Small-Scale Farming
1. Sustainability
Small-scale farms often adopt sustainable practices such as crop rotation, composting, and organic farming, which help maintain soil health and reduce environmental impact. Such practices support a more sustainable agricultural system.
2. Community Engagement
Small-scale farms can strengthen local communities by providing fresh, locally-grown produce. Farmers’ markets, community-supported agriculture (CSA) programs, and farm-to-table initiatives foster connections between farmers and consumers.
3. Diverse Crop Production
Unlike large monoculture farms, small-scale farms can grow a variety of crops. This diversity reduces the risk of crop failure and provides a wider range of fresh produce to the community.
4. Better Quality Produce
Small-scale farmers often prioritize quality over quantity. This focus on quality leads to fresher, more nutritious, and better-tasting produce compared to mass-produced alternatives.
5. Economic Resilience
Small-scale farming can contribute to local economies by creating jobs and supporting other local businesses. Farmers can also diversify their income through value-added products like jams, cheeses, and homemade goods.
Challenges of Small-Scale Farming
1. Limited Resources
Small-scale farmers often operate with limited financial resources and may struggle to access capital for equipment, seeds, and other necessary supplies. Managing cash flow can be challenging and requires additional planning and strategizing.
2. Labor Intensive
Small-scale farming is labor-intensive, requiring significant time and effort. Beyond the physically demanding work of planting and harvesting, farmers also have to invest energy into marketing and selling what they produce.
3. Market Access
Finding and maintaining a reliable market for produce can be difficult. Small-scale farmers must often compete with larger operations and navigate complex distribution networks to reach consumers.
4. Weather Dependence
Farming is inherently dependent on weather conditions. Droughts, floods, and extreme temperatures can all impact crop yields. Small-scale farmers must develop strategies to mitigate these risks.
5. Regulatory Hurdles
Navigating agricultural regulations and obtaining necessary permits can be challenging for small-scale farmers. You need to budget time and resources to achieve compliance with food safety standards, labeling requirements, and other regulations.
Tips for Success in Small-Scale Farming
1. Start Small and Scale Up
Begin with a manageable plot of land and expand gradually as your experience and resources grow. This approach reduces the risk of overwhelming yourself and allows for steady growth.
2. Diversify Your Products
Growing a variety of crops, and exploring value-added products, can increase your income and reduce risk. Consider niche markets and unique products to stand out.
3. Build a Strong Network
Connect with other farmers, local businesses, and agricultural organizations. Networking can provide valuable support, resources, and market opportunities.
4. Embrace Technology
Utilize modern farming techniques and technology to improve efficiency. Tools such as drip irrigation, soil sensors, and farm management software can enhance productivity and sustainability.
5. Focus on Marketing
Effective marketing is crucial for reaching consumers. Utilize social media, create a website, and utilize local markets and events to promote your farm and products.
Small-scale farming offers a rewarding path to sustainability and community engagement. While it presents challenges, the benefits of producing high-quality, diverse crops and contributing to local economies make it a worthwhile endeavor. With careful planning and dedication, small-scale farmers can thrive while also benefiting their community and the land they are stewarding.
Our app has thousands of members who post in our groups focused on Farming, Composting, Land Development and much more.
Come join the 15k+ members who are creating solutions and Crushing it!
If you are interested in submitting an article for BeartariaTimes.com as a guest writer please email Editor@BeartariaTimes.com.
Farming
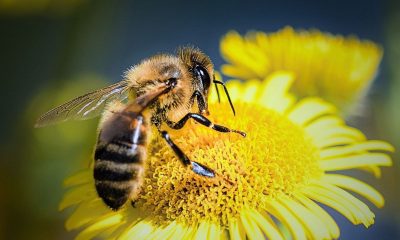
The Buzz and Benefits of Beekeeping for Homesteaders
Whether you’re motivated by the prospect of fresh honey or the joy of working with these fascinating creatures, beekeeping is a fulfilling and valuable addition to any homestead.
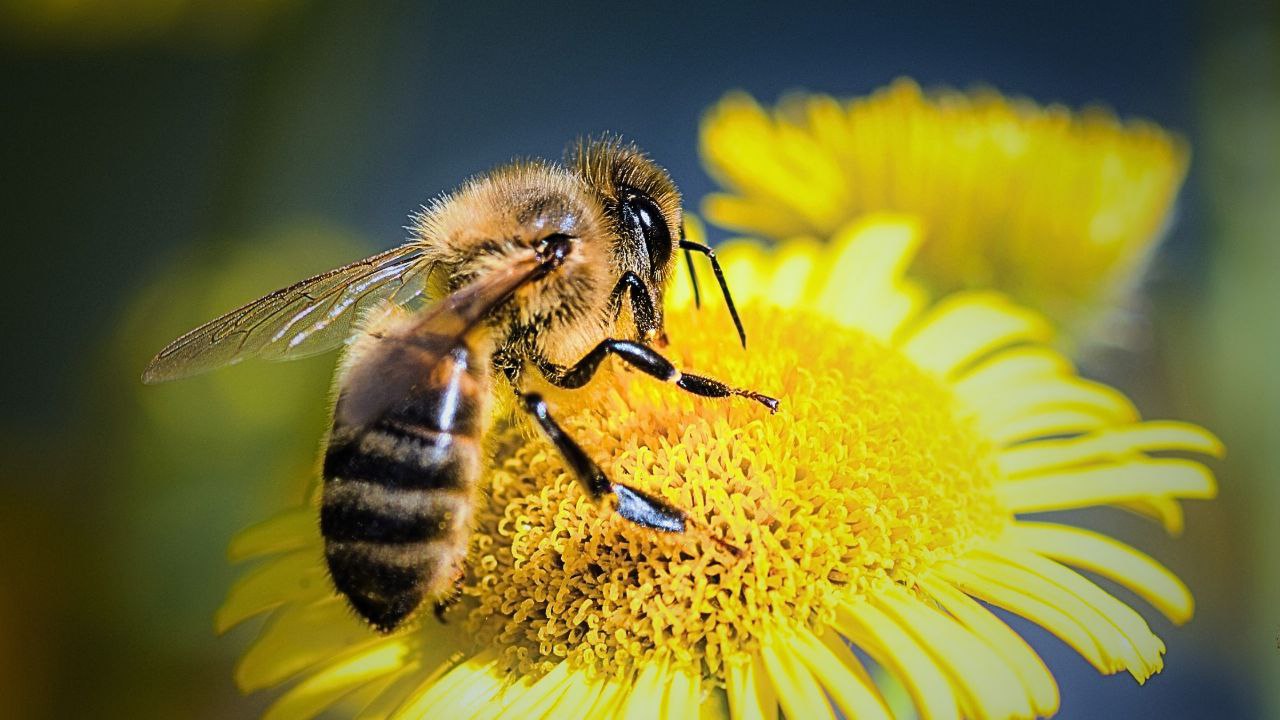
Beekeeping is a rewarding practice that offers numerous benefits for homesteaders. Beyond producing delicious honey, beekeeping supports pollination, enhances biodiversity, and can even contribute to local economies. Here are some of the key benefits of beekeeping and why it might be a perfect addition to your homestead.
Benefits
- Honey Production
- A pure natural sweetener, honey is versatile and can be used as a natural remedy for various aliments, included in baking, or used in cooking. Home-harvested honey is free from additives and preservatives, ensuring a pure and natural product.
- Honey has health benefits it can soothe sore throats, aid in digestion, and provide a quick energy boost. It is known for its antioxidant and antibacterial properties.
- Selling honey and other hive products like beeswax candles or propolis can provide an additional source of income for homesteaders.
- Pollination
- Bees are essential pollinators for many crops, including fruits, vegetables, and nuts. By keeping bees, you can improve the pollination of your garden, offering better-quality produce and higher yields.
- By helping to pollinate a wide range of plants, bees contribute to having a greater biodiversity. This supports a healthier ecosystem and can enhance the resilience of your homestead.
- Healthy pollinator populations support other wildlife by contributing to the production of seeds and fruits that feed birds and other animals.
- Education and Enjoyment
- Beekeeping is an engaging and educational hobby. It provides a hands-on way to learn about the life cycle of bees, their behavior, and their critical role in the ecosystem. This can be a family-friendly activity that teaches children about responsibility, biology, and environmental stewardship.
- Additionally many beekeepers find tending to their hives to be a meditative and calming experience, providing a way to connect with nature and reduce stress.
- Environmental Benefits
- Beekeeping helps counter the habitat loss, pesticides, and disease that are contributing to the decline of bee populations. By providing a safe habitat and practicing sustainable beekeeping, you contribute to the conservation of these vital pollinators.
- Many homesteaders adopt organic beekeeping practices, which avoid the use of harmful chemicals. Not only is this healthier for beekeeping it can enhance your homestead overall and promote a cleaner environment.
- Beekeeping raises awareness about the importance of bees and the challenges they face. By becoming an advocate for bees, you can educate your community and encourage more environmentally friendly practices.
- Beeswax and Other Hive Products
- You can use beeswax to make candles, soaps, lip balms, and lotions. These products are natural and chemical-free, making them ideal for personal use or for selling at local markets.
- Propolis, a resin-like substance bees use to seal their hives, has antimicrobial properties and can be used in natural remedies and supplements.
- Royal Jelly is a nutrient-rich substance, produced by worker bees, is often used in skincare products and health supplements due to its potential wellness benefits.
Getting Started with Beekeeping
- Research and Education
Start by learning as much as you can about beekeeping. Search resources from books, to online coursed, and get in touch with local beekeeping associations. Understanding the basics of bee biology, hive management, and seasonal care is crucial.
- Choosing the Right Equipment
Invest in quality beekeeping equipment, including hives, protective clothing, and tools for managing your bees. Consider starting with a beginner’s kit that includes the essentials.
- Selecting Your Bees
Choose a bee species suited to your climate and environment. Common choices include Italian bees, known for their gentle nature, and Carniolan bees, valued for their hardiness and efficient honey production.
- Setting Up Your Hive
Place your hive in a location that provides good sunlight, protection from strong winds, and access to flowering plants. Ensure the area is safe and convenient for regular hive inspections.
- Regular Maintenance
Beekeeping requires regular maintenance, including monitoring hive health, managing pests, and harvesting honey. Regular inspections help you catch problems early and keep your bees healthy.
Beekeeping offers a multitude of benefits for homesteaders, from improving crop yields and supporting biodiversity to providing a source of income and natural products. With commitment the right knowledge, you can create a thriving apiary that enriches your homestead and contributes to the health of the environment. Whether you’re motivated by the prospect of fresh honey or the joy of working with these fascinating creatures, beekeeping is a fulfilling and valuable addition to any homestead.
Did you know we have an entire category group in our app just about Beekeeping that currently has more than 1,100 members following it due to shared interest in the topic?
If you are interested in submitting an article for BeartariaTimes.com as a guest writer please email Editor@BeartariaTimes.com.

Everyone Homeschools Their Children

Don’t Let the Internet Distract You From Real Life

Victim Consciousness: A Poison to Cultures and Nations

Preserving the Harvest: Techniques for Long-Term Storage

The Workout-Success Connection: How Physical Fitness Transforms Every Area of Life

Comedian Owen Benjamin Disrupts The Comedy Scene

Building a Sustainable Off-Grid Home: A Fundamental Guide

10 Essential Skills Every Homesteader Should Master

Legends Spiral Upwards: Embracing Timeless Attributes

The Rise of Small-Scale Farming: Benefits, Challenges, and Tips for Success

The Buzz and Benefits of Beekeeping for Homesteaders

The Power of Community: How Local Groups Can Strengthen Homesteads

Independence Isn’t for Everyone

New Vendors, Workshops and Events At The 2024 Beartaria Times National Festival! (Bean Spilling)

Prepare For The Future You Don’t Want…
Building a Sustainable Off-Grid Home: A Fundamental Guide
Comedian Owen Benjamin Disrupts The Comedy Scene
The Workout-Success Connection: How Physical Fitness Transforms Every Area of Life
Don’t Let the Internet Distract You From Real Life
Preserving the Harvest: Techniques for Long-Term Storage
Victim Consciousness: A Poison to Cultures and Nations
Everyone Homeschools Their Children

“The Donkey Who Carried The Ark” – A New Children’s Book by HandDrawnBear

Brett Pike- Founder of ClassicalLearner.com Launches New YouTube Channel

A look at This Year’s Fourth of July Northeast Crushfest

The Beartaria Times National Festival Tickets Are Now Up For Sale!

A Review and Commentary of Olive Tree Bear’s Hit Song “My Tribe”

Midwest Bear Fest Recap and Reflection

‘And Then There Was “Crushfest”‘

Medieval Greenhouse On The Prairie

Onward Beartaria – Anchor Bear
-

 Lifestyle3 weeks ago
Independence Isn’t for Everyone
-
Farming3 weeks ago
The Rise of Small-Scale Farming: Benefits, Challenges, and Tips for Success
-
Just Crushing2 weeks ago
Legends Spiral Upwards: Embracing Timeless Attributes
-
Farming3 weeks ago
The Power of Community: How Local Groups Can Strengthen Homesteads
-
Lifestyle2 weeks ago
Building a Sustainable Off-Grid Home: A Fundamental Guide
-
Lifestyle2 weeks ago
10 Essential Skills Every Homesteader Should Master
-
Just Crushing1 week ago
Comedian Owen Benjamin Disrupts The Comedy Scene
-
Farming3 weeks ago
The Buzz and Benefits of Beekeeping for Homesteaders