


As a child growing up in Wyoming, my family would go hiking and camping every summer in the Medicine Bow National Forest. One of our favorite camping spots was a place named Vedauwoo (pronounced Vee-duh-Voo). Vedauwoo is known for its strange piles of boulders. This is also a great place to find various types of evergreen bushes and trees, and even to this day I still go hiking there to forage for items I use regularly in my natural remedies.

Surrounded by all the various types of pine trees as a child, I had no idea that when I grew up I’d discover they contained one of the most fascinating natural medicines. There is an age old remedy I have discovered that has worked wonders for me and my family in repeatedly beating the common cold and flu, sometimes even in the harshest of conditions.
Field Tested Pine Remedy
During a 19-day course on POW training and wilderness survival while in the Army, I gained some valuable practical experience using these evergreen trees to treat various ailments. The chief ailment I used it for was a common cold/flu.
It was November in North Carolina, when I came down with a fairly severe cold. Staying as silent as possible in our small hide site, piled next to 5 other team mates, I must have also reached a fever since I was shivering while huddled in my 3-layer sleeping bag. Not wanting to be medically dropped from the course, and also just wanting to try ANYTHING to make me better, I began making cups of pine needle tea. This is before I was aware of what terpenes were and how they worked in breaking down mucus and other buildup in the body. All I knew was that my SERE instructor told me it had lots of Vitamin C in it.
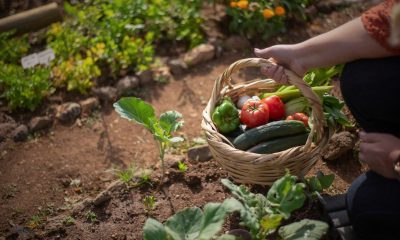
I would take water from a stream, boil it, and add the pine needles. I also shared some rose-hips I’d found with my teammates. My cough was barely noticeable after the first night. A cough can often worsen when exposed to cold air. I was cautiously observant in case my conditioned worsened. It did not. My fever also quickly subsided after the first night. Quite surprisingly, nobody else on my team came down with any illness despite our close proximity sleeping in our cramped hide site. The hide site was literally in the nook of a hill where we piled branches and leaves over a few logs and made a makeshift cave. It blended in nicely with the surrounding landscape, but it was like sleeping in a sardine can. Nevertheless, I quickly beat the flu just in time for us to be thrown in a van with bags over our heads, headed to the more brutal part of our training. The rest of my time in that course could have been a disaster had it not been for the application of pine needle tea.
10 Years Later
Since I left the military, I have used this cold and flu treatment every year and have passed it along to my family with similar results. I decided this year to further refine my plant based medicine bag. After a brief search, I found three great tasting combinations you can try that will further boost the already reliable homeopathic treatment of Pine Tip Tea.
Just as it sounds, the tips of the pine boughs can be harvested and simmered in hot water. Although any green pine needles will make an effective tea, the new growth at the ends of the pine boughs hold the freshest and most readily available nutrients. These can be harvested throughout the year, but are perhaps most potent when gathered in the spring. If properly dried, the pine tips can be kept for over a year and still maintain their potency. Keeping the dried bits in a cool, dark, dry area like a root cellar is probably the best condition for their preservation.
Why is it so Effective?
You may also be aware of turpentine, which comes from distilled pine tree sap. There is a small amount of this age-old medicine all throughout the tips of the branches as well. The plant terpenes (after which Turpentine is named) are known to prevent infection in cuts and may even help break down lymphatic buildup in your body that lead to various other illnesses. They also help break down mucus in the body which is amazing when you have a chest cold.
Pine Tip Tea pairs nicely with many other herbal remedies including thyme (used for digestive issues as well as treating coughs), camphor (a powerful cold remedy), and even onion (same). These are all useful not only in the treatment of the symptoms of a cold or flu, but they contain the ingredients your body can use to heal itself far more rapidly than it would if you just gave it drugs. The more we examine nature based medicine, we see how man-made chemicals that are engineered by billion dollar companies really only mask the symptoms of an illness yet do very little to help the body heal itself. We will do better.
Try These Three, Tea-hee
Feel free to expand on these three simple Pine Tip Tea recipes. Your sense of smell will let you know if your body needs or wants any of the properties in the concoctions. As a bonus, these are all safe to give to children, and have been used for many centuries in both early western and native medicine. I have given this to my own daughter throughout her life with good effect. Note: I like to mince the pine a bit if using the long needles, and simmer for 10-20 minutes. You can even let it sit overnight. This is to draw out the maximum amount of nutrients from the pine tips. You can try steeping it like a normal tea as well, as I have not scientifically tested which method is better.
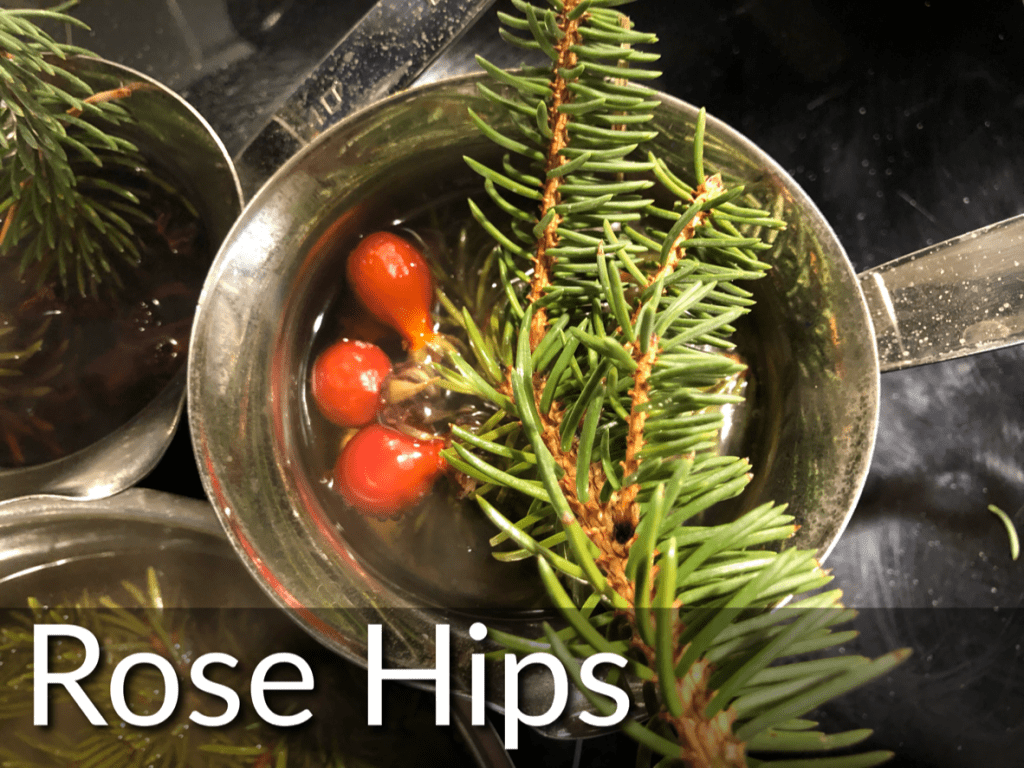
In the pan of water, add a handful of pine tips
Add 4 or 5 rose hips (dried or fresh, crushed or whole)
Simmer for 10 minutes
Pour into mugs and enjoy
Sweeten with raw, unfiltered honey if desired (honey is a great remedy for sore throats)

In the pan of water, add a handful of pine tips
Add a two or three finger pinch of thyme (fresh or dried) (if its crushed you can use a tea strainer to keep the pieces together if desired)
Simmer for 10 minutes
Pour into mugs and enjoy
Sweeten with raw-unfiltered honey if desired
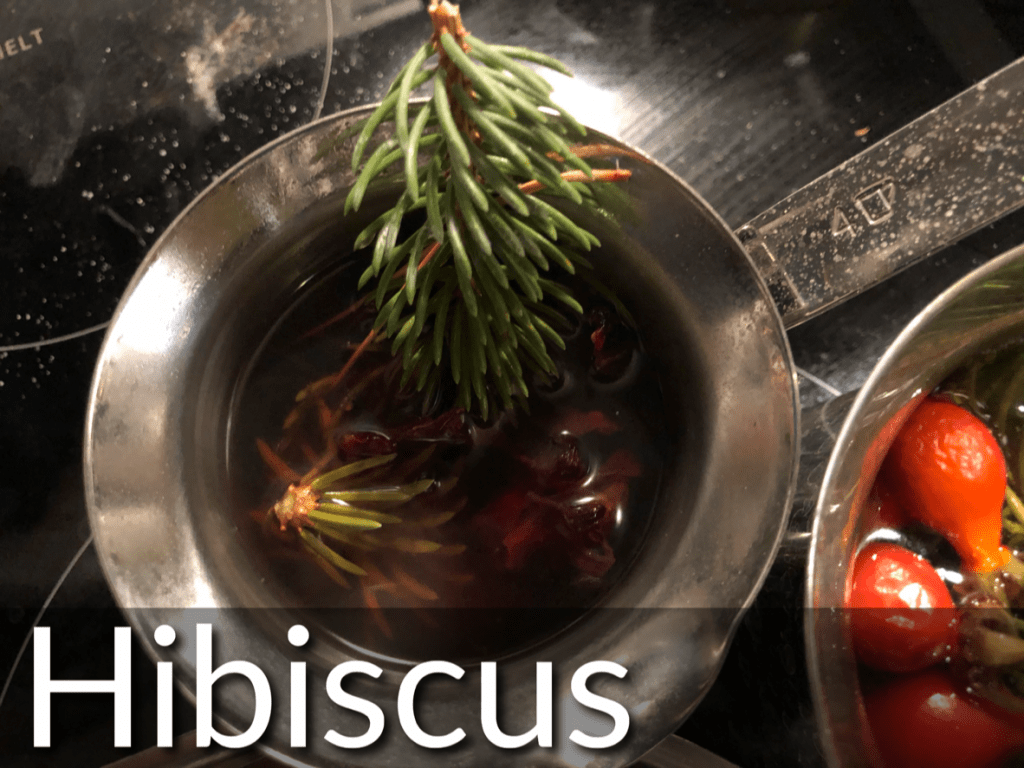
In the pan of water, add a handful of pine tips
Add dried hibiscus flower
Pour into mugs and enjoy
Sweeten with raw-unfiltered honey if desired
Thanks for reading! If you have any natural remedies you’d like to share, we’d love to hear them and perhaps publish them as our next featured article! Submit completed articles and pictures to wellness@beartariatimes.com Check out more remedies at our Wellness page.


When we think of working out, the immediate benefits that come to mind are usually physical: improved strength, better endurance, or a more athletic physique. But physical fitness transcends the body. The habits, skills, and mindset developed through consistent exercise can be the ground work for success in all areas of life—personal, professional, and spiritual.
- Discipline: The Foundation of Progress
At the heart of every workout routine is discipline. Showing up day after day, regardless of how you feel, builds the muscle of commitment. In the gym, it’s about doing one more set even when you’re tired. Outside the gym, it’s about sticking to long-term goals, pushing through setbacks, and maintaining consistency. Whether it’s advancing your career, deepening relationships, or pursuing personal development, discipline is what keeps you moving forward when motivation fades.
- Goal Setting and Achievement
Fitness is one of the most tangible ways to practice goal setting. Whether you’re aiming to lift a certain weight, run a particular distance, or hit a body fat percentage, every fitness objective requires planning, dedication, and action. The same approach applies to all areas of life. Setting clear, measurable goals with timelines—whether it’s a promotion at work, learning a new skill, or achieving financial stability—is crucial for success. Working out teaches you to break larger goals into smaller milestones, track progress, and celebrate achievements along the way.
- Resilience and Mental Toughness
Life is filled with challenges, and developing valuable character attributes is key to overcoming them. Exercise, particularly intense or strenuous routines, trains your mind to push through discomfort and adversity. Each difficult workout is a lesson in perseverance, and over time, you learn to embrace challenges rather than shy away from them. This mental toughness translates to other aspects of life—helping you navigate difficult conversations, tackle complex projects, or handle unexpected setbacks with grace and determination.
- Focus and Time Management
In our increasingly distracted world, focus is a superpower. Effective workouts demand that you be present and intentional, whether you’re lifting weights, running, or practicing yoga. This mindfulness in training sharpens your ability to concentrate on the task at hand, which is essential for productivity and efficiency in your career and personal life. Furthermore, balancing a consistent workout routine with other responsibilities enhances your time management skills, teaching you to prioritize and schedule effectively.
- Confidence and Self-Belief
Few things build self-confidence like the steady progress you see through regular training. As you hit personal bests or notice changes in your body, your sense of self-worth grows. This confidence isn’t just about appearance—it’s the belief that you can set goals, work toward them, and achieve them. When you believe in your ability to succeed in one area, like fitness, it spills over into other areas of life, from tackling new projects to speaking up in meetings or taking risks that lead to personal growth.
- Health and Energy: The Foundations of High Performance
Without health, everything else suffers. Regular exercise boosts your physical health, increases energy levels, improves sleep, and reduces stress—all essential for performing at your best in life. Whether you’re pursuing professional excellence or personal fulfillment, having the energy and vitality to keep going is crucial. Fitness ensures that you have the physical and mental capacity to perform at your peak across all domains.
- Accountability and Responsibility
In the gym, no one else can do the reps for you. You are responsible for your progress, and there’s no shortcut to achieving results. This accountability is a powerful principle that applies to life in general. Success requires taking ownership of your actions and outcomes.
Whether you’re managing a business, leading a team, or cultivating personal relationships, understanding that your effort directly impacts your results is key.
- Adaptability and Growth Mindset
Workouts often require you to adjust your approach based on how your body feels, how much progress you’ve made, or what obstacles arise (like injury or fatigue). This adaptability is crucial in all areas of life. The ability to pivot when necessary and stay open to learning and growth—even when faced with failure—fosters long-term success. In fitness, as in life, you’ll face plateaus and setbacks, but those with a growth mindset continue to evolve and improve.
Conclusion: Fitness as a Gateway to Total Life Success
Working out is far more than a physical endeavor. It’s a powerful training ground for life skills that will help you excel in every area. From discipline and goal setting to resilience and adaptability, the attributes you develop in the gym serve as tools for overcoming challenges, achieving success, and becoming the best version of yourself. So the next time you lace up your shoes or lift that weight, remember: you’re not just working on your body—you’re building the foundation for a successful and fulfilling life.
And taking that step into fitness training doesn’t have to be overwhelming. Even something as simple as adding a 20-minute walk to your day can spark positive changes throughout your life. Knowing that this extra effort can ripple into every area, from your mindset to your energy levels, is empowering—and it’s a reminder that small, consistent actions can lead to transformative results across your entire life.
Wellness
Beartaria Times Member Shares History and Benefits of Haymaker’s Punch
Today, we saw a post that will be very beneficial in the coming summer heat, especially for those out in the fields!

Whether it’s valuable resources or witty fun, we find great content on our community app every day. Today, we saw a post that will be very beneficial in the coming summer heat, especially for those out in the fields!
Numismaticbear shared a post introducing some of us to Switchel, also known as Haymaker’s Punch!

This sounds like a great beverage to put together!
Thanks for sharing Numismaticbear!

I tried EC for one week, and I’m never going back. Elimination communication allows your baby to relieve themselves outside their diapers and for you to be in tune with their bathroom needs just as you do with knowing when they are hungry.
This can lead to caregivers becoming more in tune with the baby, giving the baby the option of hygiene, cutting down on waste/laundry, and assisting in earlier toilet training. In many countries today, EC is the standard instead of disposable diapers, just without the fancy name.
Do you use the restroom when you wake up or leave to go somewhere? Well, so does baby, and this is the concept of the four easy catches. If it all sounds complicated, just using time and transition to your advantage is a great place to start. The “four easy catches” are offering the baby the potty upon waking up, at diaper changes, signs of effort, and during the transition (getting in and out of something such as the car seat or baby carrier).
For Mothers (or other caregivers) familiar with EC but have yet to try it because it sounds too daunting, I encourage you to try it!
Before my daughter was born, I knew I wanted to use cloth diapers and implement EC. But I wanted to do these things as they came organically and not force myself if it brought more stress than benefit. By three weeks, I was using cloth diapers, and by 6 1/2 weeks, I began EC with her.
In the first week, my baby had only a few poopy diapers. She usually lets me know when she needs to go. Sometimes, I miss it, and sometimes, I put her on the potty, and nothing happens. It is important to remember why you started and not focus on the misses.
While this article wasn’t meant to be a complete study on the subject, I did want to introduce others to the practice or share my positive experience with those aware of EC.
Many resources online cover the subject in depth, I encourage mothers to read around if this is new to you.
I just wanted to share that it works! I took it slow and still utilize diapers, but I am super happy I began to try and implement EC.
-

 Lifestyle3 weeks ago
Independence Isn’t for Everyone
-
Farming3 weeks ago
The Rise of Small-Scale Farming: Benefits, Challenges, and Tips for Success
-
Just Crushing2 weeks ago
Legends Spiral Upwards: Embracing Timeless Attributes
-
Farming3 weeks ago
The Power of Community: How Local Groups Can Strengthen Homesteads
-
Lifestyle2 weeks ago
Building a Sustainable Off-Grid Home: A Fundamental Guide
-
Lifestyle2 weeks ago
10 Essential Skills Every Homesteader Should Master
-
Just Crushing1 week ago
Comedian Owen Benjamin Disrupts The Comedy Scene
-
Farming3 weeks ago
The Buzz and Benefits of Beekeeping for Homesteaders