Farming
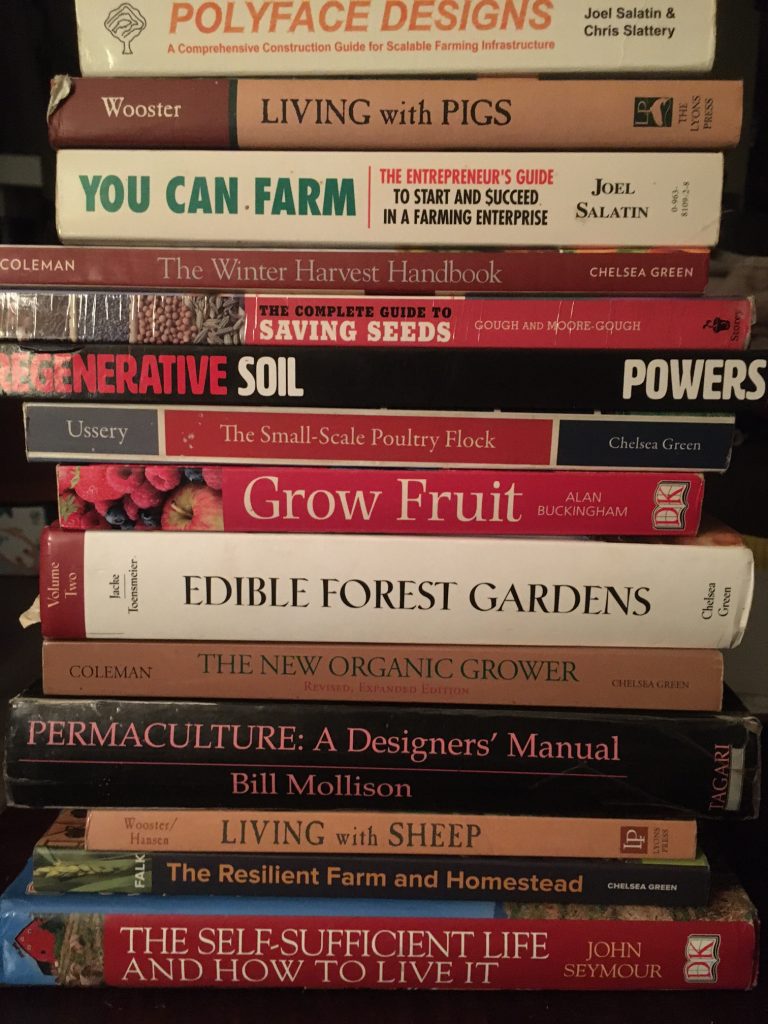
From the Bookshelf of Mr. Permie Bear…
Each of these books has brought information of perspective that continues to bring us value on our farm and homestead.

This is a sampling of what I consider some of the most valuable books on my shelf. Each of these books has brought information of perspective that continues to bring us value on our farm and homestead. The only order I have given them is to separate the more advanced books so that people just beginning their adventure don’t unknowingly spend much money on something they will have a hard time applying.
Basic List:
| Title and Author | Why I like it |
| Gaia’s Garden by Toby Hemenway | Classic, home-scale permaculture book. It helps give you a simplified guide to the permaculture design process and principles while giving you actionable steps. It has several reference tables for later when you are getting busy. |
| Carrots Love Tomatoes by Louise Riotte | A great all-around guide to companion planting to help you find plants that work well together and avoid ones that don’t. |
| The Family Cow by Dirk van Loon | Many consider this the definitive first book and resource on your journey to dairy cow bliss. It doesn’t cover every possible thing that can come up, but you will get your feet under you to have success with your cow. |
| The River Cottage Curing & Smoking Handbook by Steven Lamb | Ok, I haven’t read this cover to cover yet, but we did refer to it when making prosciutto, and this book comes highly recommended by Brandon Sheard of Farmstead Meatsmith, and I trust his opinion. |
| The Art of Natural Cheesemaking by David Asher | Our favorite cheesemaking book because it focuses on what you can do with natural ingredients and processes that our ancestors would have had. I have yet to see a recipe needing the thermophilic culture. Instead, you will find your supplies to include things like kefir, whey, or lemon juice. |
| Duck, Duck, Goose by Hank Shaw | I think most homesteads need ducks. But what do you do when you have too many males, and they go to freezer camp? This book came highly recommended to us when we decided we could take or leave duck meat. Friends don’t let friends eat mediocre duck recipes. |
| Polyface Designs by Joel Salatin and Chris Slattery | I couldn’t decide whether this was advanced or not; after all, this isn’t a cheap book. After thinking about it, I think it belongs on the basic list to help you avoid some design errors when putting your infrastructure together. These are not the only designs that work; this is a solid place to start for all kinds of things. There’s always room to innovate, though, should you be so inclined. |
| Living with Pigs by Chuck Wooster | Definitely not the most in-depth book on pig keeping, and there are things I wish the author talked about that he did not, but we successfully raised pigs our first time after reading this book. It’s an enjoyable read, too, not a textbook. |
| You Can Farm by Joel Salatin | Whether you intend to farm for profit or not, Joel lays out many principles that apply to running a good farm. If you ever plan to sell a product, I highly recommend this. If you don’t know, he is one of the most successful smallish farmers. |
| Pastured Poultry Profits by Joel Salatin | This book is specific to raising meat birds for sale and includes chickens. Pretty dang close to everything you need to know to be successful on just about any scale any of us are likely to do. |
| Salad Bar Beef by Joel Salatin | This is all about… you guessed it, running a 5-acre orchard! Just kidding. Obviously, about beef. He introduces you to the world of managed intensive grazing, low-input farming, and all kinds of good stuff. |
| No Risk Ranching by Greg Judy | Another great resource concerning rotational grazing and pasture management, Greg has quite the track record going from losing the family farm to owning many and leasing thousands of acres without owning the cows. He goes into detail on his business model. I have not done that part, but he has solid advice for pasture management. He also has fantastically hilarious and inspiring stories. |
| Come Back Farms by Greg Judy | In the follow-up to No Risk Ranching, Greg goes into more detail and tries to cover things he either didn’t know at the time or didn’t explain very well. Please don’t get this one without the first one; its value will be limited without foundation. |
| The Winter Harvest Handbook by Eliot Coleman | My favorite gardening author. This one focuses specifically on low-input techniques to maximize your growing season by harvesting all winter long. He is in Maine. If he can do it, it’s possible almost anywhere. |
| Four Season Harvest by Eliot Coleman | Great for the small farmer and home gardener alike. Eliot lays out the foundation for year-round growth. He’s all about low input and is one of the pioneers here in America when it comes to that. Did I mention he is my favorite garden author? |
| The Complete Guide to Saving Seeds by Robert Gough and Cheryl Moore-Gough | A solid book on saving seeds. It includes all kinds of veggies, herbs, flowers, trees, etc. Not absolutely everything I want to know, but I am a data nerd, and this is a pretty solid resource all around. |
| The Small-Scale Poultry Flock by Harvey Ussery | Harvey is a chicken legend. This book will give you everything you could hope for regarding chickens (primarily laying hens, but he does talk meat, too)—my favorite chicken book. |
| Grow Fruit by Alan Buckingham | I bought this at Lowe’s on a whim. Glad that I did! It gives you a solid foundation on every fruit you could imagine and includes pruning time and how-to, recommended varieties, and what can go wrong. |
| Living with Sheep by Chuck Wooster | Chuck is at it again, this time with sheep. As with pigs, not an absolutely comprehensive guide that will tell you every possible thing you need to know, but you probably won’t kill your first sheep either (at least on accident, he does talk about butchering). It definitely gets you going in the right direction as a newbie. Couple this with Greg Judy’s info on multispecies grazing, and now you’ve got something! |
| The Resilient Farm and Homestead by Ben Falk | Ben is awesome. This book is another intro to permaculture-type book that takes you through the basic design process, but Ben has a really unique perspective on things that I appreciate. He might be wrong on the climate change thing, but his points as to what to do in general are spot on. The man grows his own rice in Vermont. How can you not want to read it? |
| Sepp Holzer’s Permaculture by Sepp Holzer | Classic intro to permaculture book. Sepp practiced permaculture before he knew what it was and possibly before it had even been defined. He grows fruit at elevations they told him were impossible—an excellent read for any homesteader, especially those with steep land and challenging conditions. |
| The Self Sufficient Life and How to Live it by John Seymour | This was the first all-around homesteading book I got, and still my favorite. John covers just about every subject you can imagine, from growing vegetables to metalworking. Are you going to be proficient at everything he discusses by reading this? No. But you will have a basic knowledge that will help you get started and quickly learn more as you discover what you are interested in pursuing. He even gives ideas on how he would lay out an urban garden, a 1-acre, and a 5-acre homestead. |
Advanced list:
| Title and Author | Why I like it |
| Permaculture: A Designers’ Manual by Bill Mollison | This is the book. The most in-depth permaculture design book that I am aware of. This book is the foundation of nearly every course one could take to become a permaculture designer. This is a textbook that reads like one most of the time. The depth and breadth of information in this book about every aspect of human needs is staggering. |
| The New Organic Grower by Eliot Coleman | Look! He made the advanced list too! I almost put this on the basic list but decided on advanced because it is primarily geared toward those who want to grow vegetables as their source of income. However, so much of it is still applicable to home gardeners as well. |
| Edible Forest Gardens by Dave Jacke with Eric Toensmeier | So you want a forest garden? Do you want a 2 volume set that will give you way more information than you could ever possibly remember? Are you a data nerd wanting to know what root pattern just about any tree has, its growth habit, and its attributes that may be of use? Then this book is for you! It goes over the design theory in volume 1. Volume 2 is the process and a terrific resource with tons and tons of charts. This would be my go-to resource if you wanted to design a really well-put-together forest garden or especially if you wanted/needed to design one professionally. |
| Regenerative Soil by Matt Powers | This book blows my soil nerd mind. Just about every nutrient cycle you can imagine is explained. About every physical, chemical, or biological soil attribute you could be curious about. After reading this book, you’d be well on your way to being an expert in soil. The best part is the nearly 100 pages of solutions. How to address all kinds of problems, make your own inoculants and fertilizers, and more. Matt Powers has a gift for assembling vast amounts of information and making it understandable and actionable. Highly recommend it if you want to take your soil to the next level. |
| The Forest Garden Greenhouse by Jerome Osentowski | Jerome has a tropical greenhouse at 7800’ in the Rockies of Colorado and only has to heat it 18 days a year. What’s your excuse? Got some money and want to go greenhouse crazy? Incredible resource and very inspirational. So many possibilities. |
| Restoration Agriculture by Mark Shepard | This is in the advanced list, not because it’s a difficult read or full of complex concepts, but because it is precisely for farm-scale permaculture with a heavy emphasis on tree crops like chestnuts. Great read. You know you want to find out what cat and robin pruning is, don’t you? |
| War and Peace by Leo Tolstoy | Because I am going to read it one day and you probably should too, if not only to say that you did because you are a legend. |
– Mr. Permie Bear


Farming
Cicada Shells Are Beneficial For Your Garden?
This post opens up many other interesting concepts, like fungal networks under our gardens…
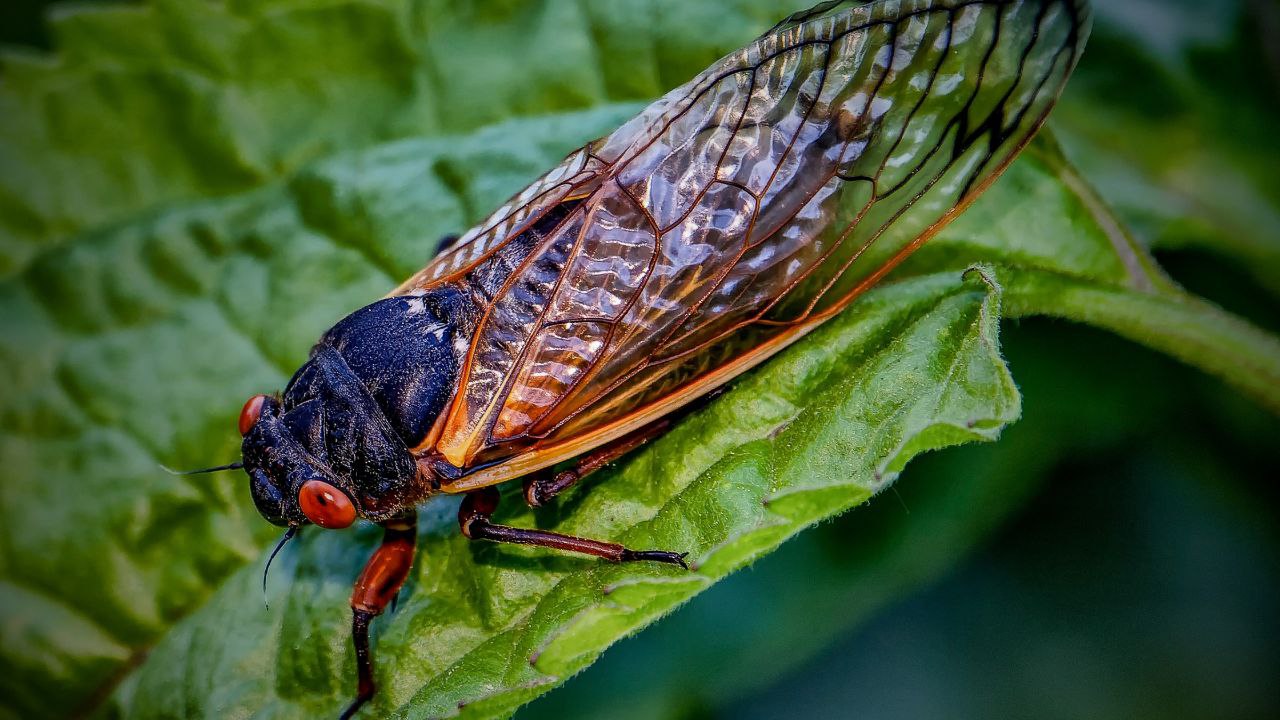
While scrolling our community app today, we came across an interesting post from Skeptical Bear, which exposed us to the idea of Cicada Shells and Chitin.
This post opens up many other interesting concepts, like fungal networks under our gardens, that we would love to hear more about!
Skeptical Bear went on to share some articles and cite his research,
https://www.shroomer.com/chitin-in-fungal-cell-walls/
https://pubs.sciepub.com/wjce/11/4/1/index.html
We haven’t dove into these articles yet so let us know what you think!
Farming
So, That’s Where That Saying Comes From!: Living the Phrases in my Beartaria
Living on a farm and living the phrases that come with it, you find yourself with lots of literal ‘Fences to Mend’ and ‘Gatekeeping’ to do.
By FruitfulBear
My dynamic shift from a lifestyle of apathy to a fruitful focus on the good, the true, and the beautiful came with a new awareness of the possible origins behind previously trite catchphrases. I started noticing and found myself greatly entertained and oddly fascinated with phrases and sayings I’d grown up with.
In the summer of 2020, I started making the notes that grew into this article. The first time I ever harvested blackberries from a bush, they grew in the front yard of the house I lived in with my mother and sister. Several bushes were growing next to each other, and the hedge they made was brambly and mildly daunting to my newly awoken yard working ability.
I wore sleeves that weren’t thick enough, gloves that weren’t thick enough, and there was a very low yield on these bushes I was harvesting from. At 33 years old, the only food I had ever foraged for was tangerines off a small, short tree at the side of my grandparent’s driveway. By comparison, these blackberries presented as a ‘Thorny Problem.’
I came inside after my earnest endeavors and presented my roughly two cups of blackberries to my family. Delighted with the ‘Fruits of My Labor,’ I grinned as I explained my new thoughts on the ‘Low Hanging Fruit’ concept. The berries, though few, were delicious, and the tangible way I found myself living the phrases that had previously meant so much less was going to ‘Bear Fruit’ of its own for years to come.
We moved to 5 acres in Idaho at the end of 2021 and, in short order, found ourselves getting chickens, goats, ducks, and a garden. It has been an adventure-and-a-half, full of many opportunities to crush and lots of phrases to live. From our chickens, I came to new understandings about the phrases:
- ‘Tough Old Bird’ – when harvesting old roosters
- ‘Cocky’ – the attitude of said roosters every day before they were harvested
- ‘All Cooped Up’ – the behavior of our flock on the rare occasions when we were forced to keep them in their roosting area all-day
- ‘Flew The Coop’ – when we let them out after being cooped up, there is simply no other way to describe them practically launching themselves out the door to get back into the sunshine
- ‘I’ve Got A Bone To Pick With You’ – when cleaning the chicken carcasses, separating all the meat scraps for soup
- ‘She’s a Good Egg’ – I decided this must be shorthand for laying hens that produce good, properly formed chicken eggs
- ‘Chickenshit’ – this insult doesn’t land quite the same after you’ve cleaned out the coop floor under a flock of roosting chickens
- ‘Pecking Order’ – the chickens were developing one of these long before you and your co-workers thought to
- ‘Not All It’s Cracked Up To Be’ – do I really have to explain this one
Now, if we move on for a moment to our ducks, ‘That’s a Whole Different Animal’ and ‘Like a Duck to Water,’ you can easily understand, if you are used to chickens by comparison, that ducks are a bunch of crazy ‘QUACKS!’ But, ‘Like Water off a Ducks Back,’ they don’t really care what the chickens are doing because ‘Birds of a Feather Flock Together.’
Living on a farm and living the phrases that come with it, you find yourself with lots of literal ‘Fences to Mend’ and ‘Gatekeeping’ to do. You ‘Travel The Well Worn Path’ to and from your barn all day. And, when you start finding hay and straw in more places than the sand manages to get to at the beach, you can’t argue against calling the feed bales ‘Flaky.’
When you’re trying to cut the ‘Ties That Bind’ on those same hay bales, and every single chicken that calls your barn home is demanding that you feed them their scratch grains, ‘Underfoot’ is definitely alive for you.
You’ll be tempted to ‘Cry Over Spilled Milk’ and find yourself turning the phrase ‘I’m Working Through It’ into a mantra of grit and endurance. The ‘It’ becomes muscle fatigue, headaches, or any other dis-ease in your life, physical or otherwise. You keep ‘Working Through’ because creatures big and small depend on you and don’t go away just because the work is more challenging to accomplish that day.
It becomes the highest of compliments when, at the end of a hot summer day after the sun has set, that first small breeze blows a whiff of cooling night air into the house, and you consider how nice it is to be compared to a ‘Breath of Fresh Air.’
Watering your garden as the strawberries, tomatoes, and other delectable produce start ripening enough to eat just a few before the full harvest, having ‘First Pick’ has never been more desirable.
Whatever temporary obstacles are between you and your Beartaria, I know you will ‘Get to The Root of the Problem,’ so just keep crushing.
I’ll end for now by wishing you all a ‘Crumby’ life since it means you got to have your ‘Daily Bread.’ And, I’ll ‘Level With You’ that I may reach out again in the future so we can ‘Chew The Fat’ while thinking about some more of our experiences as we live the phrases all around us.
Farming
How A Christian Taught Me To Slaughter Halal
While thinking of God’s judgment over me, my nervousness began to leave.

Reader discretion: This article discusses the processes of slaughtering lambs.
I begin with the name of The God, Most Gracious, Most Merciful.
So there I was, swimming in gravy and joy during the second annual Beartaria Times National Festival.
The bonfire roared and crackled, harmonizing with the diverse chatter of hundreds of people around the beautiful property. From outbreaks of laughter to questions that provoked silence and a subtle “woah” from engaged attendees meeting old friends for the first time, the atmosphere embraced you in a feeling of belonging, like a destination was found.
This destination, however, was not just the beautiful Missouri property but an environment manifested by all the legends that came with pure intentions, knowledge, wisdom, and guiding lights of family leadership, a meeting of lords and ladies from across the realm. Truly an elite class of prosperous minds and hearts.
The discussions were meaningful, and the light hearted humor was balanced with innocence and wit.
I had many moments of silence and reflection, smiling to myself as I felt the joy radiating from groups of legends around me.
While I had many valuable discussions, learned many things, and made many friends, one conversation made a huge impact on my life and assisted me in a 15-year-old goal and aspiration that seemed far from reality.
As I stood there, looking into the fire, having a moment to myself, I began to talk with an adventurous and inspirational legend.
He shared all kinds of experiences with me, from his long-distance marathons that I have always dreamed of pursuing to his experience as a high-profile chef, business adventures in Norway, and now his life of living in Missouri out of a converted school bus.
He began to tell me about his new venture of offering butchering services in Missouri. I was immediately intrigued and began to tell him about halal slaughter and my desire to be able to properly slaughter animals in accordance with Islamic requirements.
He comfortably and instantly resonated with it as he performs what he calls “Mercy slaughter”, a biblical slaughter that parallels Islamic guidance for slaughtering animals. I was super happy to hear this and saw the opportunity to ask all those questions I had about the preferred methodology of animal slaughter.
Almost 15 years ago, I began learning about halal slaughter. I found it fascinating and optimal for the animal and the consumer. It was instantly something I wanted to pursue. I never had the desire to do it commercially, but I wanted to be able to for myself, my family, and my wider community.
A little about halal slaughter and its requirements:
- The animal should have the name of God invoked over it during slaughter.
- The animal should be in a state of submission, mitigating all fear and pain.
- The animal should be slaughtered with one slice of the neck with a sharp blade. A clean cut without multiple cuts.
- The animal should receive food and water and be well kept.
- The animal shouldn’t be isolated or taken off alone to a strange place.
This process eliminates or minimizes the release of fear hormones like adrenaline and cortisol. Now, I don’t own a white lab coat, so I won’t pretend to know much about it. But the idea is that the animal goes out peacefully, respectfully, and is content. The process should be an act of worship and gratitude, invoking God over the animal to remember the source and reason for the sustenance that has been provided for you.
Having gratitude empowers the will to appreciate and take care of what you have been blessed with. Animals are amazing creatures, and it is our duty to be the best of shepherds and custodians over them. As a duty, there is accountability over us, and while we may not realize the accountability over us in this life, if we neglect to acknowledge it, we often find negative effects of it in our life.
So as I began the discussion of halal and mercy slaughter, I was happy to learn that the Butcher slaughters sheep and goats with a knife. He would lay them down, say a prayer, and efficiently slice their throats with one clean stroke.
This was what I wanted. I was well-studied in the topic but never met someone who does this, let alone regularly and comfortably.
I had all kinds of questions for him, like what kind of knife to use, the positioning of the cut, managing the situation, and seeing through the process of the animal bleeding out.
Not only was the helpful Bear able to answer all my questions, but he was also able to instill confidence in me to do it.
I expressed that I had 2 lambs at home that were being prepared for slaughter in the winter of 2023. After getting all my questions answered, I really started to feel prepared to take this on.
As winter approached after the festival, the lambs were really starting to look ready. My neighbor here in Idaho was also a huge help, working as a processing butcher for many years, a big-time hunter, owner of a taxidermy business as well. His shop has wolf hides, mountain lion hides, massive elk antlers hanging on the walls, and every tool you can imagine.
I reached out to let him know I was planning on slaughtering the lambs and how I wanted to do it. It wasn’t common for him to see it this way, but he is familiar with it and offered to help any way he can.
Leading up to the day, I was feeling nervous. I had the right knives, I knew what I was doing, but the nervousness was from the fear that I wouldn’t do right by the animal and thus not right under God.
I spoke to the helpful Bear again, and he played it all out for me, he even FaceTimed with me as he demonstrated positioning with his dog as a participant in the demo!
This really helped calm my nerves as he is such a matter-of-fact kind of guy. While not being a Muslim, he slaughters animals biblically, which is very much in line with Islamic direction. We bonded on the intention, the motive, and the blessing of what we have been provided.
The morning of the planned slaughter, my neighbor stopped by, which I wasn’t expecting. I thought I would just bring them to him after they were slaughtered. At first, it made me nervous again as there is someone watching me perform something I have never done before. Although I quickly remembered that it is God that I should fear and God that I remember as the one that I am accountable to.
While thinking of God’s judgment over me, my nervousness began to leave.
One of my longtime friends went into the lamb pen and herded them out the gate, at which point I grabbed the animal and steered it only about 15 feet to under a tree that they grew up by. At this point, my nervousness was completely gone.
We lifted the animal’s legs, laid it down on its side, and put enough pressure to keep it down. I began to pet the animal, being firm and comforting to the beautiful lamb I raised since it was little, jumping around my yard with joy. The lamb then went limp and showed me that it had submitted to its position and where it was. I then spoke in Arabic. “I begin with the name of The God, The God is the greatest”. I repeated this as I positioned my knife and when things felt right, I said it again and made the appropriate cut.
Leading up to it, I felt as though it would be a hard cut to make, imagining a thick hide and a lot of resistance; however, with a firm, well-intended cut, the knife passed through the correct position quite easily. Its neck opened up, and it was as if the animal went instantly unconscious, limp, and breathing deeply as the blood started to flow without any sporadic behavior. The blood spilled out consistently for about 1.5 minutes as expected, then the animal gave its final impulse kicks, and it was gone.
My neighbor was very impressed, saying how amazing it was to see the animal go so peacefully and how it was such a clean, well-managed situation. He repeated to me that the animal had such a peaceful, respectful death.
I felt great knowing that it was done to the best of my ability. I did my due diligence, and the guidance given to me was properly executed. It also felt great sharing this with my neighbor and him witnessing a halal slaughter, which even in a rural homesteading area is not common at all.
I had one more lamb, the male, which was always a little more powerful and brave than the female. I repeated the same process with a little more time spent on making it feel comfortable on the ground under me. Just like the first, the animal did submit and relax. I felt its temper slow down, its breathing slowed down, as though it said “fine, okay, I’m here and I submit”.
The process was just as smooth, and afterwards, seeing both these animals laid to rest, I stood up and felt as though I rose from prayer.
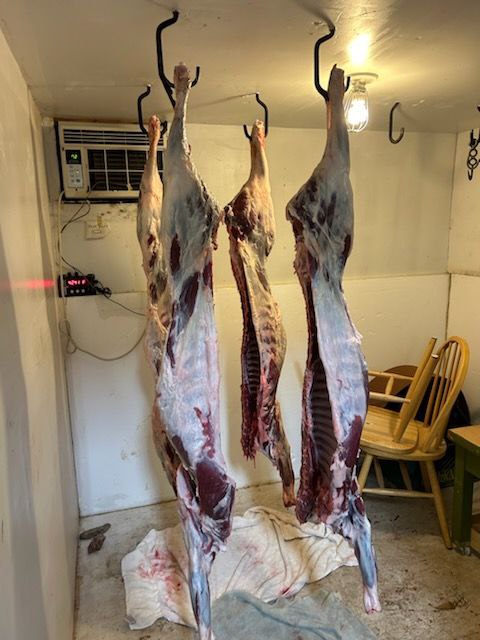
We then took the animals next door, and my neighbor helped me half them and put them in his freezer. He refused to take any money from me, saying something to the effect of ,
“I’m at a point in my life where the last thing I need is cash. I want to share these skills with the youth and anyone that wants to learn because these skills keep us free and thriving.”
While the internet can often be filled with debates, disagreements, elevations of self, and identities pitted against each other, my experience with two men of different faiths supported me in mine, not because of their endorsement of an identity label but because of the unity of truth. Truth that transcends labels, social opinions, or branded demographics.
While I have loved the Beartaria Times community since its inception, this whole experience has proved it is what it was designed to be.
Not a community based on the unity of identity, but unity of truth, sincerity, and aspirations for better lives for ourselves and for others. To respect and appreciate the diversity of each other’s opinions and thoughts to empower us forward, not as a wedge to prevent sharing things that matter.
Islamically, upon the birth of a child, it’s custom to slaughter an animal and to give 1/3rd away to family, 1/3rd to friends, and 1/3rd to the needy.
In December 2023, my wife and I celebrated the birth of our first child. Alhamdulilah!
I gave away one of the butchered lambs, to which I received so many great reviews. It was said that it was the best lamb people have ever had, the meat was so soft, picky children even asked for more!
It really inspired people to look into cultivating lambs or supporting me in escalating things.
In conclusion, I want to say thank you to the legend that helped with the amazing mentorship, thank you to my wonderful neighbor, thank you to the Beartaria Times festival team, thank you to The Beartaria Times and all the legends supporting it, thank you to the Big Bear for cultivating this community in a way where it is cultivating itself beyond the internet controversies and back to things that matter.
All praises to The All Merciful, The All-Powerful, Our Sustainer, and Our Provider.

New Vendors, Workshops and Events At The 2024 Beartaria Times National Festival! (Bean Spilling)

Prepare For The Future You Don’t Want…

Applications Now Open For Topher’s Dome Building Workshop

National Festival Speaker Line-Up Announced!

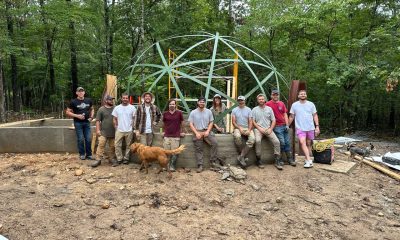
Christopher Gardner Completes First Dome Framing Project in Missouri: Exclusive Interview

Making Pine Needle Soda: A Fantastic Foraged Beverage

3000 Members In Our Business Group!: This Week On Our Community App!

Beartaria Ozark Campground Kicks Off This Year’s Campaign!

Cicada Shells Are Beneficial For Your Garden?

Beartaria Times Member Shares History and Benefits of Haymaker’s Punch

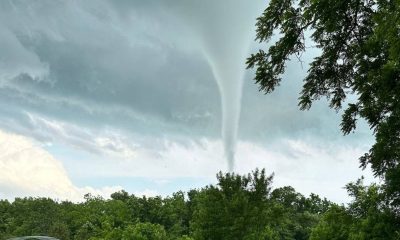
Report: EF-1 Tornado Touches Down In The Ozarks

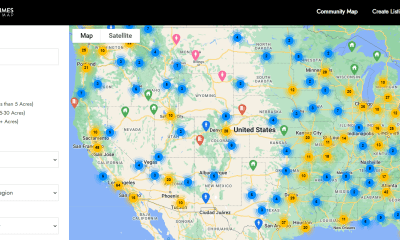
Map it! – Discover Beartarians Living, Working, and Crushing Near You!

Beartaria Ozark Campground Launches Community Forum!

Why Do We Feel So Free?

Reconnect and Rejoice: Beartaria Times Weekly Challenge
Applications Now Open For Topher’s Dome Building Workshop
Prepare For The Future You Don’t Want…
New Vendors, Workshops and Events At The 2024 Beartaria Times National Festival! (Bean Spilling)
National Festival Speaker Line-Up Announced!

“The Donkey Who Carried The Ark” – A New Children’s Book by HandDrawnBear

Brett Pike- Founder of ClassicalLearner.com Launches New YouTube Channel

A look at This Year’s Fourth of July Northeast Crushfest

The Beartaria Times National Festival Tickets Are Now Up For Sale!

A Review and Commentary of Olive Tree Bear’s Hit Song “My Tribe”

Midwest Bear Fest Recap and Reflection

‘And Then There Was “Crushfest”‘

Medieval Greenhouse On The Prairie

Onward Beartaria – Anchor Bear
-

 Just Crushing2 weeks ago
Christopher Gardner Completes First Dome Framing Project in Missouri: Exclusive Interview
-
Just Crushing2 months ago
Beartaria Ozark Campground Launches Community Forum!
-
Just Crushing2 months ago
Map it! – Discover Beartarians Living, Working, and Crushing Near You!
-
Just Crushing2 months ago
Why Do We Feel So Free?
-
Lifestyle2 months ago
Reconnect and Rejoice: Beartaria Times Weekly Challenge
-
Reports2 months ago
Report: EF-1 Tornado Touches Down In The Ozarks
-
Business2 months ago
3000 Members In Our Business Group!: This Week On Our Community App!
-
Wellness2 months ago
Beartaria Times Member Shares History and Benefits of Haymaker’s Punch